You have downloaded and installed the program. Run the application by clicking the icon with a safe on the Desktop or in the Start menu (). If it is the first time you run the application, you will see the Database Management dialog box. You can either create a new data file or open an existing one. Select the Create New Datafile option and click OK. You will see the datafile creation wizard that will help you to create a new file. See “Datafile Creation Wizard” for more information.
If creating a datafile is successfully finished, the program will open the new file and it will be ready for work.
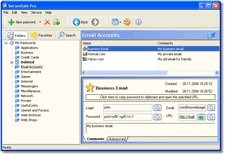
In the left part of the main window you can see the tree of categories (folders). The right part of the window is divided into two parts: in the upper part you can see the contents of the folder you select and in the lower part you can see the properties of the selected item (you can hide this panel).
To add a new folder, you should click the New Folder button on the toolbar or select the File|Create|New Folder menu item. (The shortcut key for creating a folder is F7). The dialog box for creating a new folder will appear. Enter a name for the folder, select the folder where you want to place the new folder and click OK. The new folder will appear in the left panel of the main window. (See also "Working with folders".)
To add a new password, you should select the folder where you want to place the password and click the New Password button or select the File|Create|New Password menu item. (The shortcut key for creating a new password is F11). The new password will be created and you will see the dialog box where you can edit its properties.
Fill in all the necessary fields and click Save and Close to save the password and close the dialog box. If you want to save this password and create a new one, click Save and Create. (See also "Working with passwords".)
To add a new credit card record, you should select the folder where you want to place the credit card record and click the New Credit Card button or select the File|Create|New Credit Card menu item. (The shortcut key for creating a new credit card record is F12). The new credit card record will be created and you will see the dialog box where you can edit its properties.
Fill in all the necessary fields and click Save and Close to save the credit card record and close the dialog box. If you want to save this credit card and create a new one, click Save and Create. (See also "Working with credit cards".)
To add a new file, you should select the folder where you want to place the file and click the Add File button or select the File|Create|Add File menu item. (The shortcut key for adding a new file is F9). The dialog box for entering a name for the new file will appear. Select the file you want to add and click Open. After that, the dialog box for editing file properties will appear.
Fill in or change the necessary fields and click OK. The file will be added to the program. (See also "Working with files".)